Curiouser and curiouser: creating stories and games with Alice 3 – Part 2
This article is the second part of a two-part series exploring the free 3D animation software Alice.
Part 1 was to get you ready to start with Alice and to explore the interface.
Part 2 shares my process of creating an animated mini-story with Alice 3, and I hope it will inspire you too! This isn’t a step by step how to, but there are links to the Alice 3 guides included.
Using Alice, you can:
- animate stories and build virtual reality worlds
- design and build interactive games
- learn to program object-oriented code with drag and drop code
Building your own wonderland
One of the challenges of learning new software, is how we make the most of the time we can give to learning. Sometimes there isn’t much free time for free-range exploring! You can spend hours in Alice 3 very easily fuelled on imagination. I would recommend that to make the most of your time, it’s worth honing in very specifically on why you find yourself exploring Alice 3.
Before I started making anything with Alice 3, my questions were –
- Is there something I am keen to share?
- What will pull me back here for more?
- What will make me steal time from other important things for this?
- What will get me through the frustrations of a new interface?
- What will drive me to grasp this new language?
The flame of inspiration
I had just finished a thrilling young adult fantasy novel from the library. A Darkness of Dragons by S. A. Patrick. It is set in an richly imaginative world of magic and dragons. I had already been motivated to write about why I love the novel.
I thought about how much I would love to capture the essence of the story in an animation to encourage others to read the book. My goal for an animation in Alice 3 became making a simple short animation so that I could share a teaser for the book. As a fan creation it might help the book find new readers and help promote an author, even if my animation skills aren’t that fantastic. This shifts the point of Learning Alice 3 from learning code, or mastering the software, to making a project. Being connected to something real that mattered to me also added the right amount of concern around quality. If you can come up with an idea like this, I find it helps you focus precious time and makes you look for natural efficiencies in learning.
Even though I knew my animation would be clunky, I needed to feel that I was trying to do the book justice with whatever I created. I didn’t really achieve anything special, but I had a fun.
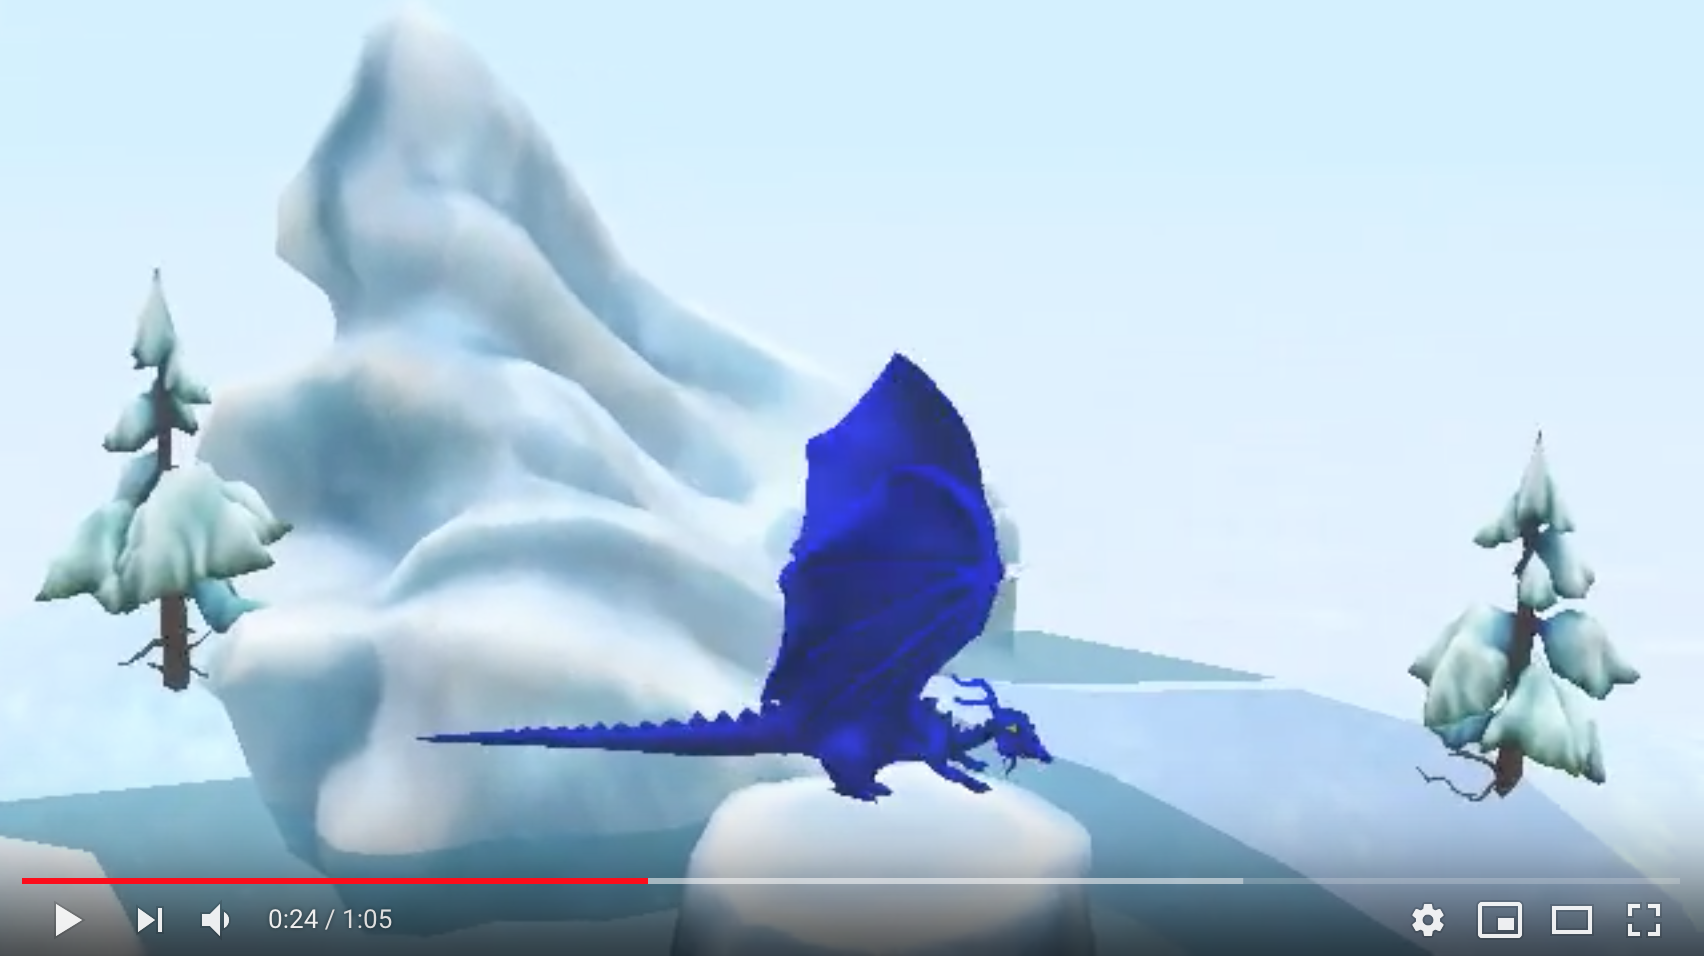
You can watch the exported video of my animation for A Darkness of Dragons here.
Creating an animation in Alice 3
“She generally gave herself very good advice, (though she very seldom followed it).”
Lewis Carroll, Alice’s Adventures in Wonderland and Through the Looking-Glass
I work as Learning Designer. I often hear myself recommend the creation of an initial storyboard for a video or animation to others. I will confess, that this something I almost never do. This could be because I am a terrible at design and just passing on my awful habits to others. The most common reason I skip storyboarding is because I will most often start with a general idea, but the nuances only emerges once I have found the soundtrack that that the animation will wrap around.
I was pleased to find an “epic” background track in the library. Listening to it, my in-head storyboarding visualised an overhead scene of dragons in a snowy winter scene, a conversation, dragons flying off. This barely scratches the surface of the story, but any more than that would be out of my scope in terms of time.
The reason I am mentioning this backward approach, is that with animation, you quite often do want to match your animation to music for timing effect. It made sense to me to begin with music, rather than trying to find music in the library to match the animation afterwards. This is probably not recommended.
For a more structured approach, particularly when using Alice 3 with students, there is a wholesome lesson in the design process for Alice 3 here.
I will highlight some of the waypoints in the process of coding an animation.
Step 1 – Using the Camera View
Choose a landscape
I opened Alice 3 and in the Starters, I found an ice-mountain world which was the perfect landscape based on S A Patrick’s Darkness of Dragons.
Once selected, the landscape appears in the Camera View.
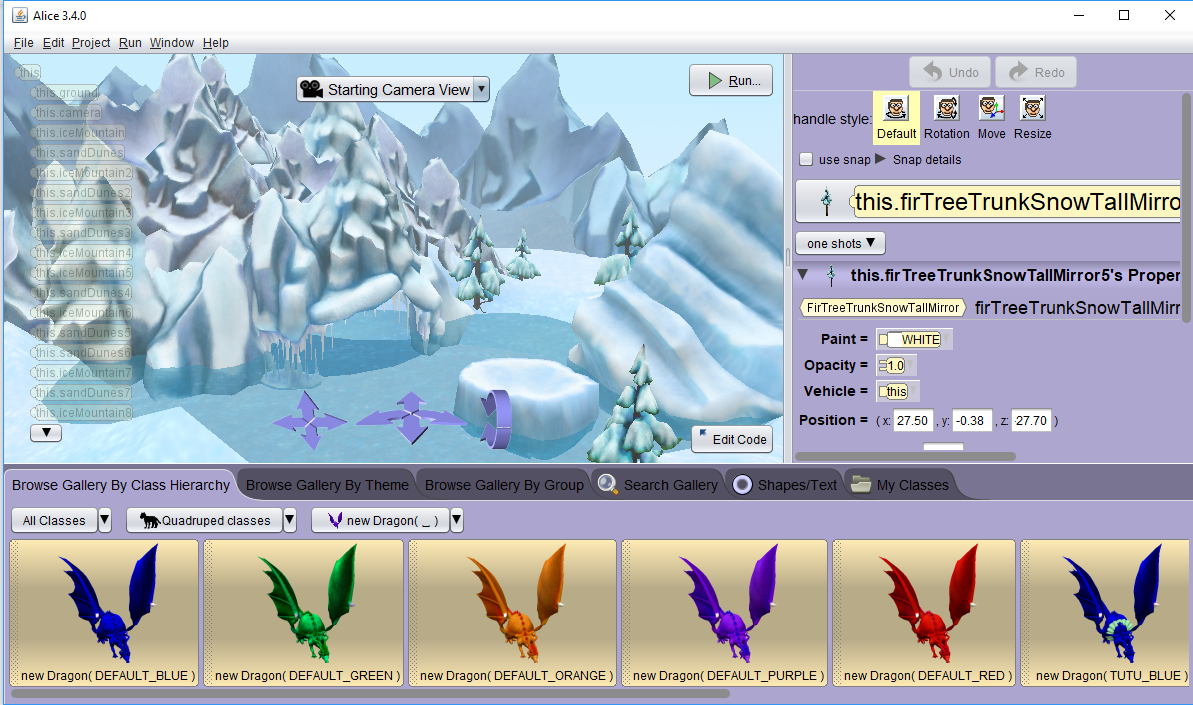
Step 2 – Using the Scene Editor
Add a character
I was relieved to find some dragons in the Alice 3 library. They were not in the flyer class as I expected, but in the quadriped class. Characters are arranged into classes, which have inheritance. For example, a dragon belongs to the Dragon class and the wider Quadriped class of four legged beasties. This structure of objects and the ability to create instances of them (thisdragon1, thisdragon2) and use reuse code to direct the animation is part of the power of object-orientated coding.
I added three dragons. I found it a little confusing that I couldn’t see my dragons in the Camera view in order to drag them onto the ice floe. I changed the Camera view and was able to see the dragon hiding in the mountain, and then drag it into position. If I didn’t want to drag the dragon, I could have selected the dragon and changed the position coordinates to match the ice floe, so that it would be nearby.
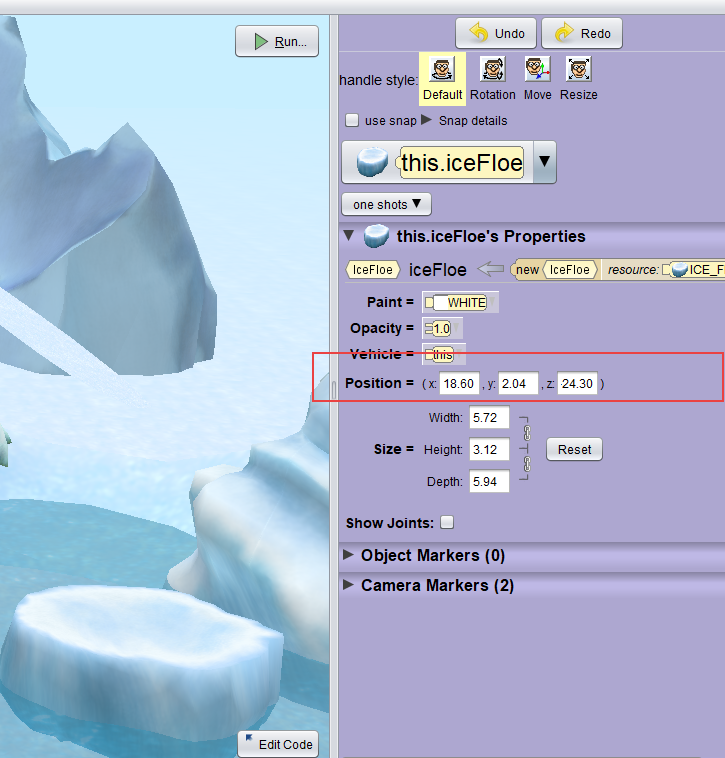
Tips for moving objects:
Hold down the left mouse button to drag on the x and z axis (side to side)
Hold down Shift and the mouse button to drag on the x axis (up and down).
If you need help with moving objects around, see Positing Objects in Alice.
Camera markers
Once my dragons were positioned around the ice floe, I added some Camera Markers. One looking down from above, and then a few closer perspectives so that the camera eye could zoom down in close.
For help with this, see Using Camera Markers.
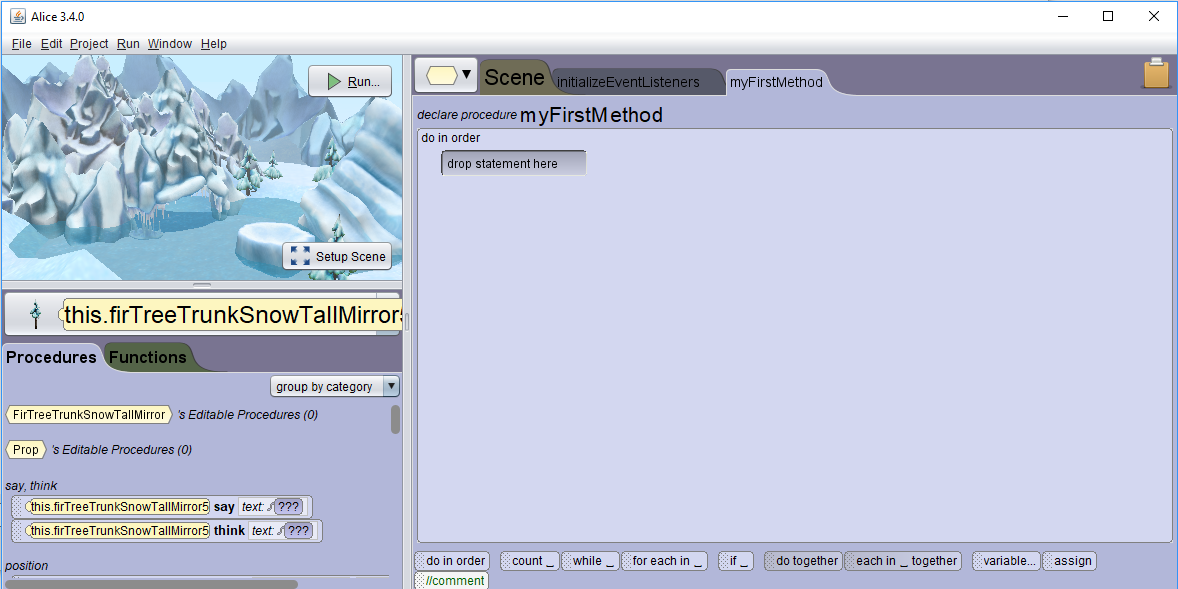
Step 3 – Using the Code Editor
Here be the dragons and the magic.
Adding background music
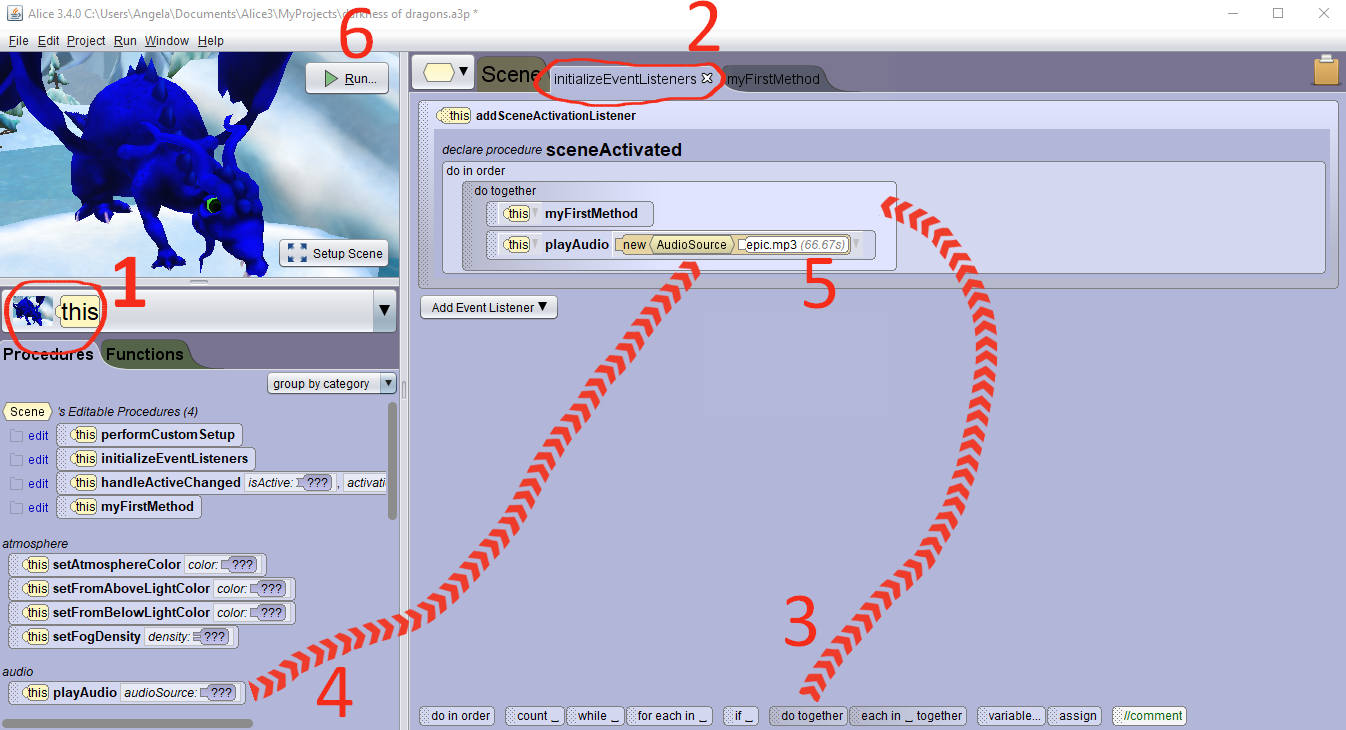
I could see that you could probably attach music to a dragon with a playAudio block, but I wanted music to play in the background of the whole project, and not just triggered by one character. I googled for a few tips and discovered that Alice 3 has a built-in event-handler playAudio which can also be added to the screenActivated procedure. This will play music when the program runs.
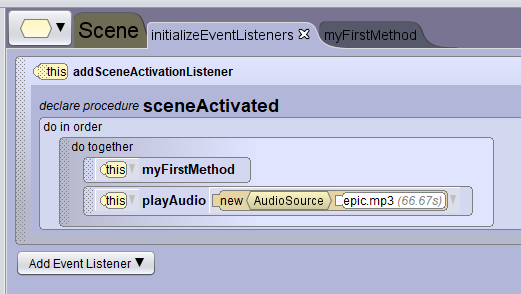
Here are the steps to add a background track, shown in the screen shot below.
- Select this (the top level)
- Open the initializeEventListeners tab in the code editor window
- Drag a do together, (so that the audio and animation play at the same time, not after each other)
- Dragged the code block for playAudio
- Select a track from the library
Now run the animation to check that the music plays.
For more detail, see Adding Background Music.
Animating dragon wings
Models in Alice 3 have built-in methods, (e.g dragons have a dancingPose and straightenOutJoints) but there wasn’t one for flaping a dragon wings or flying.
Each joint of the 3D model is available to control with code providing unlimited potential for spending hours and hours tweaking your animation to minute detail.
If you are new to working with 3D objects, see Manipulating Object Joints.
This meant that I would need to learn to write a custom procedure to move the wing joints of my dragon to make them flap, while the dragon moved. I probably wouldn’t have pushed into this territory of learning without needing to, but dragons are a pretty vital part of the story.
With a dragon selected, clicking on the Functions tab, I could see all the joints of my dragon listed. It looked like the shoulder would be the obvious joint to move.

Although the dragons have a built in functions to call on the left and right wing shoulders in the code, I would need to write my own custom procedure to tell the software what steps it should take to move the dragon wings, change postures and move each dragon in flight.
I wrote this is as a custom procedure called flyingMotion.
It looks like this in code:

To find out more, see Creating Custom Procedures.
I added my custom procedure in the dragons class so that I could reuse it on any dragons.
I would have liked to have created an entire dragon army, but I couldn’t find a simple way to clone. I decided due to time constraints, to keep things on a smaller scale.
Sound effects
I discovered the sound effect library and added some dragon roars and grunts. I’m not sure these are as effective as they could be, and some code tweaking could acheive better than just playing the sounds.
Find out more about Matching Sound to Animation
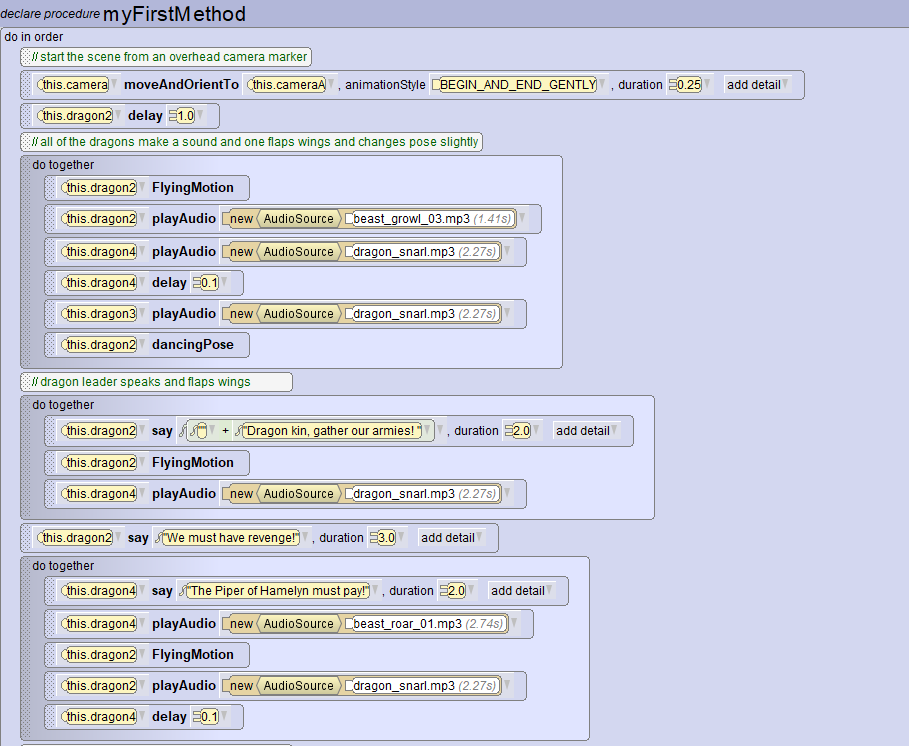
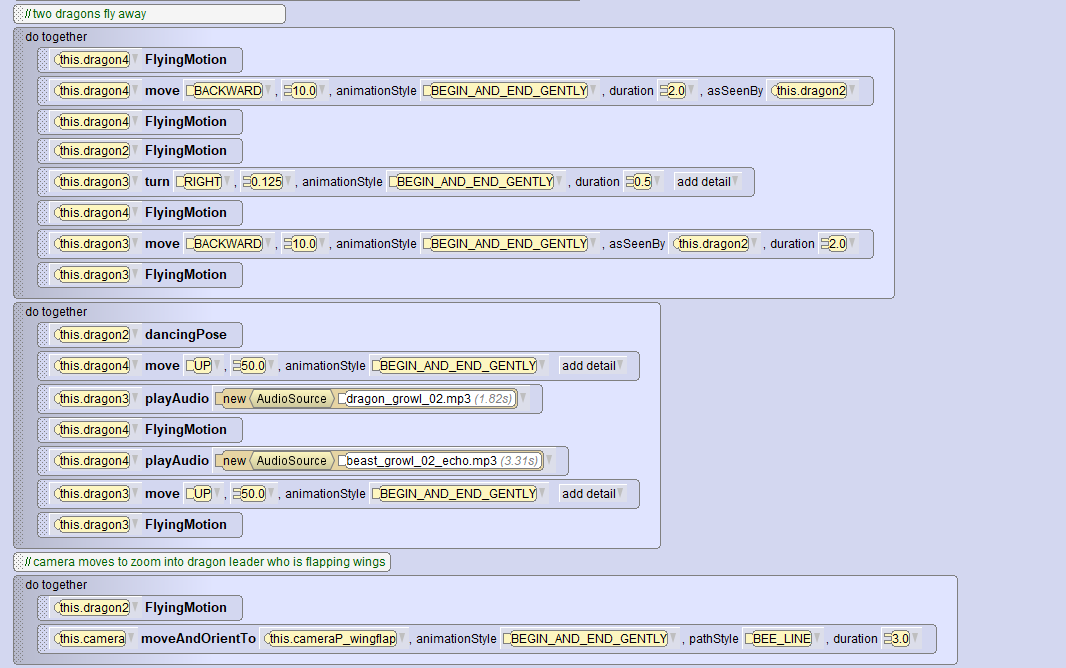
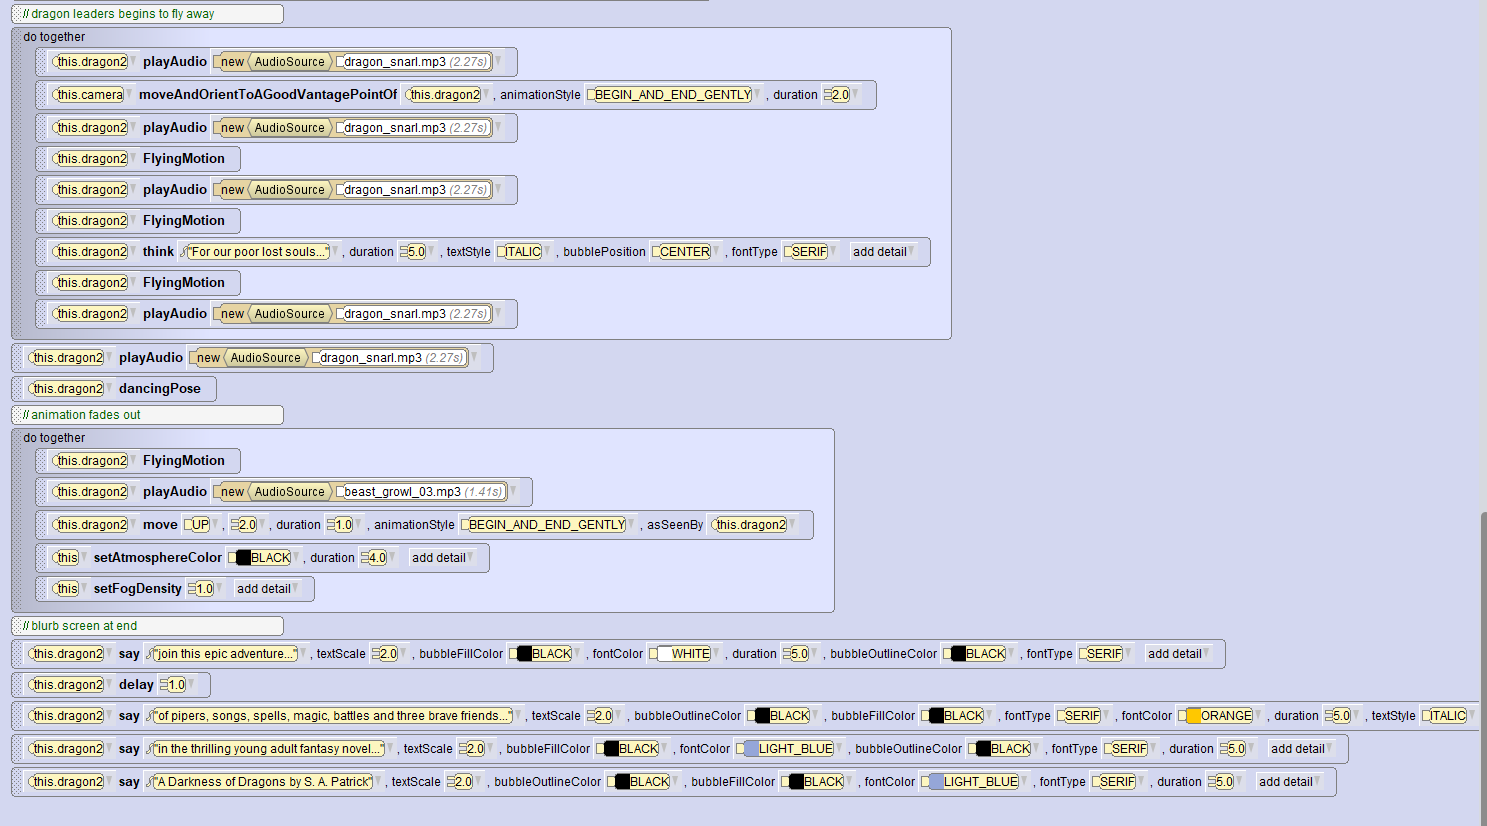
The action and conversation
Finally, in my project I added dialogue, text, and a fade-to-black transitions to end the animation.
I am including my code here, but as I am new to Alice 3, there are bound to be mistakes, inefficiencies and strange techniques.
Step 4 – Exporting a video
Exporting a video
I exported a video of the animation with the Upload to Youtube feature which creates a .webm video file (open source video format) that you can upload to youtube. Alice 3 lagged when recording the animation, but this didn’t impact the exported video.
I took an additional step of converting the file to mp4 with Handbrake, although Youtube will covert a .webm file.
You can watch my recording of the animation for A Darkness of Dragons here.
Final notes
Be gentle. This isn’t a polished or even finished animation. I spent approximate two-three hours on this, just to make chatty dragons fly over the ice mountains. This included searching google for the guides, watching the excellent modular Alice 3 videos. I would love to have had more time to tweak and hone the animation and include many more views of the landscape, use custom music and so on to create a truly cinematic experience to share a great book – A Darkness of Dragons by S A Patrick with you.
I have only explored the tip of the ice mountain with Alice 3 so far, but it has been incredible fun. The potential of Alice 3 for imaginative and interactive world building is really exciting.
